
In this post I will show how to integrate Office 365 Documents in Sales force.
Requirement is to view Office 365 Documents from sales force.
Steps can be categorized as:
- Sign up for Sales force trial account.
- Enable Files Connect option in sales force.
- Create Auth.Provider in sales force.
- Create External Data Source in sales force.
- Sign up for Office 365 trial account.
- Create Document Library and upload Documents.
- Register an APP in Azure web site(sign up if not available) for sales force.
- Browse through the Office 365 Documents from sales force.
All you need to have is Office 365 Site, Azure web site and Sales force Instance Trail accounts.
- Login to Salesforce

2. Enable Files Connect feature by searching File connect from search box from Setup page.
Files Connect allows you to connect Sales force to your Enterprise Content Management (ECM) system.
Currently supported ECM systems are:
- SharePoint 2010 & 2013 on-premises.
- SharePoint Online.
- OneDrive for Business.
- Google Drive
- Box
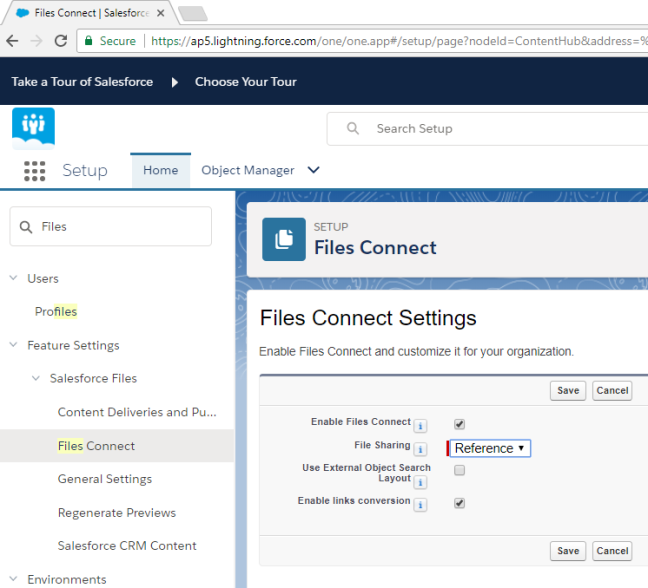
Edit, enable the Files Connect check box and Save. Files connect settings has two Sharing methods. Copy and Reference. Choose any one as per your requirement.
choose copy if you want files to be copied between the two systems.
choose Reference if you want just reference to files instead of copies.
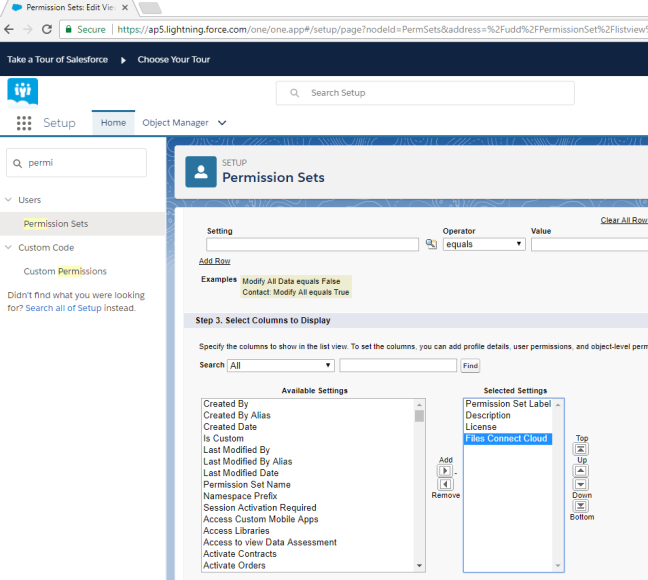
Go to Permission Sets and give permission.
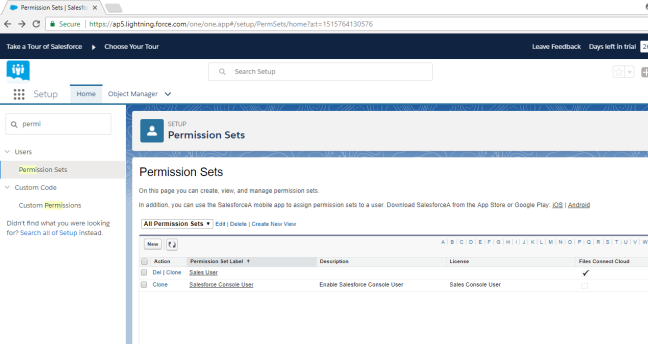
click on edit add File connect cloud, add and save.
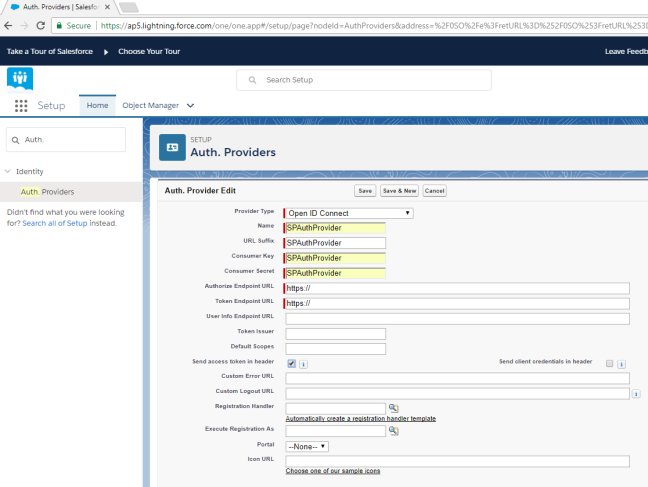
3. From Setup key in Auth.Provider in search box and create new Auth. Provider
Choose following:
Provider Type: Open ID Connect
Name: SPAuthProvider
URL Suffix: SPAuthProvider
Consumer Key: SPAuthProvider
Consumer Secret: SPAuthProvider
Authorize End Point URL: https://
Token End Point URL: https://
Remaining fields leave as default and save. All the above field should be edited later according to upcoming steps.
Click on save. * Note down the call back URL to register this in Azure web site.
4. Create Azure web website, if not, sign up under https://manage.windowsazure.com/
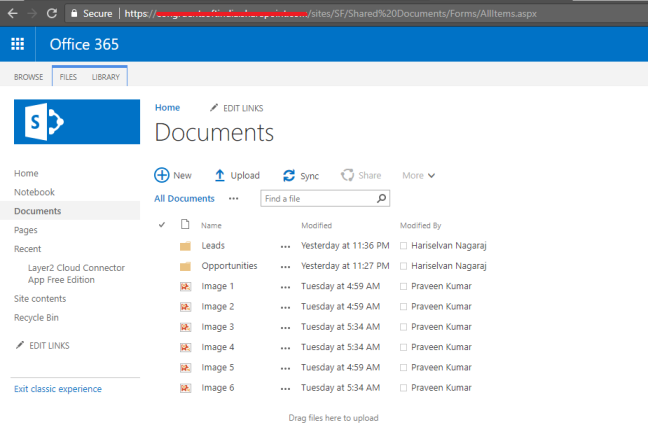
5. Create Office 365 Site Collection, if not, sign up under https://login.microsoftonline.com/ . Create site collection and upload some Documents into Documents library.
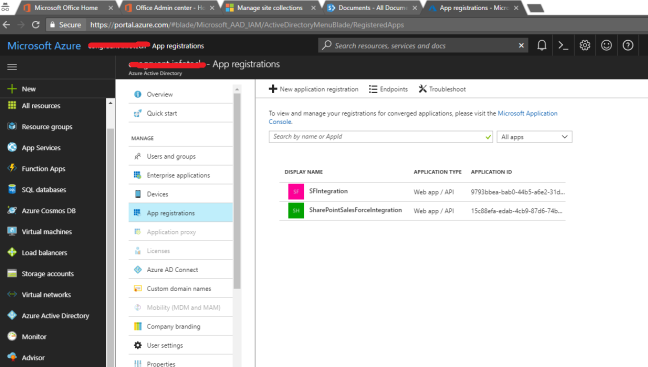
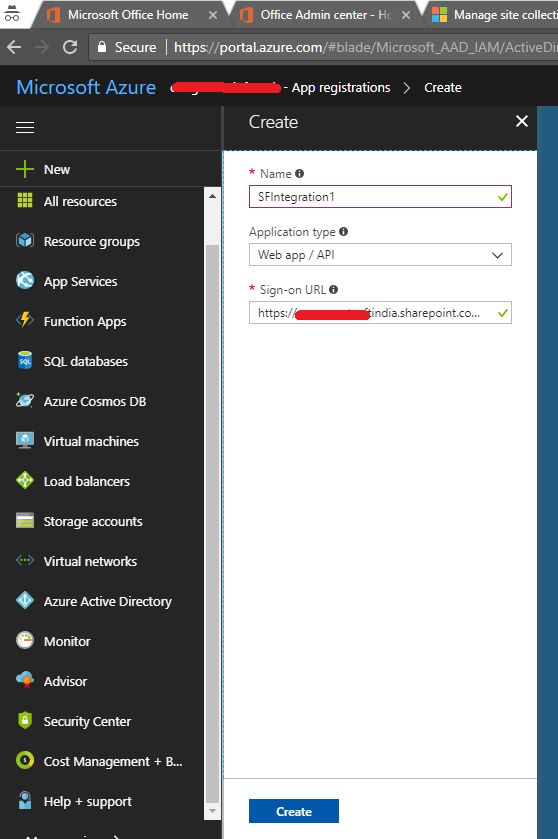
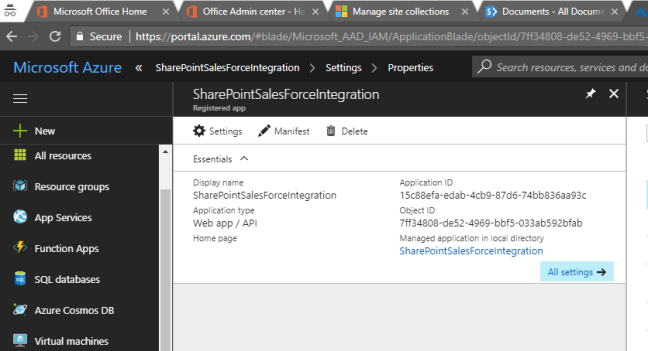
6. Go to Azure web site and choose Active Directory, choose App registrations and click on New Application Registration.
Enter Name, Application Type-Webapp/API, sign on url – provide site collection url and click on create.
Click on created application note down Application ID and Object ID.
Under Reply URLs, add sale force Call back URL that was generated in Salesforce.
https://login.salesforce.com/services/authcallback/00D7F000004A1WuUAK/SPAuthProvider
under Owners, add owner for this app.
Note: The user in Salesforce and Office 365 should be same. if not create users/groups accordingly if needed in both salesforce and office 365.
Under Permission, delete the existing and grant/ create new one with the required permissions

Under keys, provide Description, expiration and click on save. value will be auto generated and note it down separately. This value cannot be view further so be sure to note the value.
7. Now go back to salesforce and edit the Auth.Provider and provide all the details like Consumer Key, Secret, Authorize End Point URL, Token End Point URL etc.
Consumer key is nothing but Application ID generated in Azure.
Consumer secret is the value generated under keys expiration.
Authorize end point URL:
The format is “https://login.microsoftonline.com/common/oauth2/authorize?resource=https%3 A%2F%2F[YOUR_COMPANY_NAME].sharepoint.com&prompt=login”
Token end point URL: https://login.microsoftonline.com/common/oauth2/token
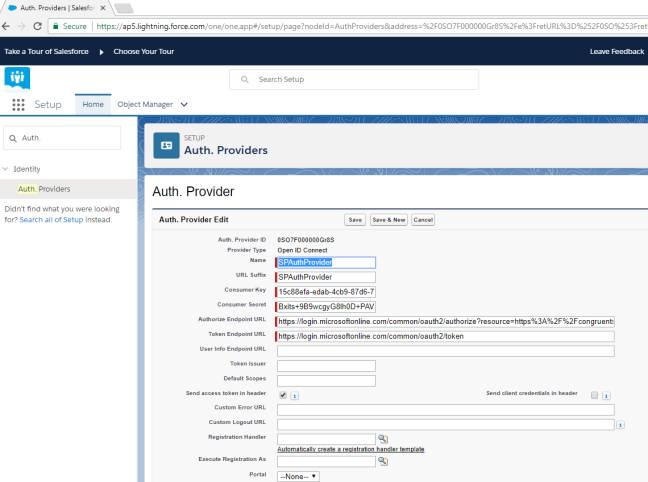
Click on Save.
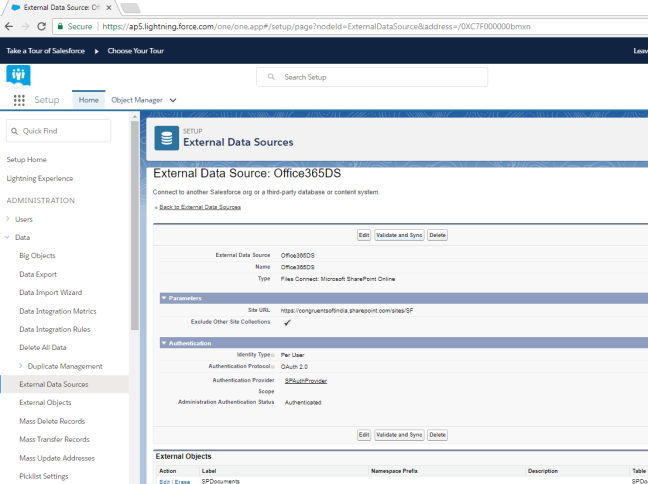
8. Go to External Data Sources and create new Data Source with following details.
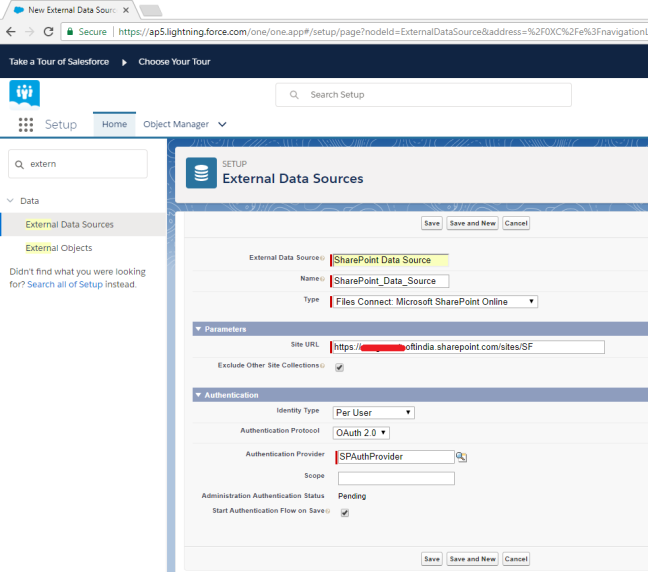
It will ask for SharePoint Online credentials. Once provided authentication, asks to trust the application, once trusted, Status will be changed to Authenticated from Pending.
9. Create External Object the external data source like below.
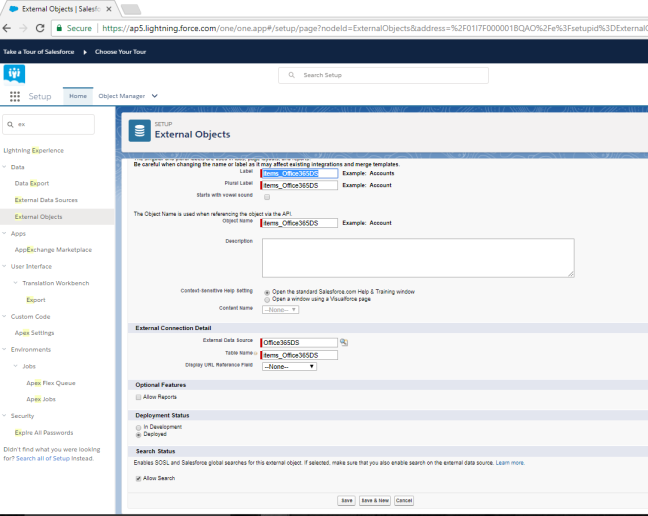
Validate and sync
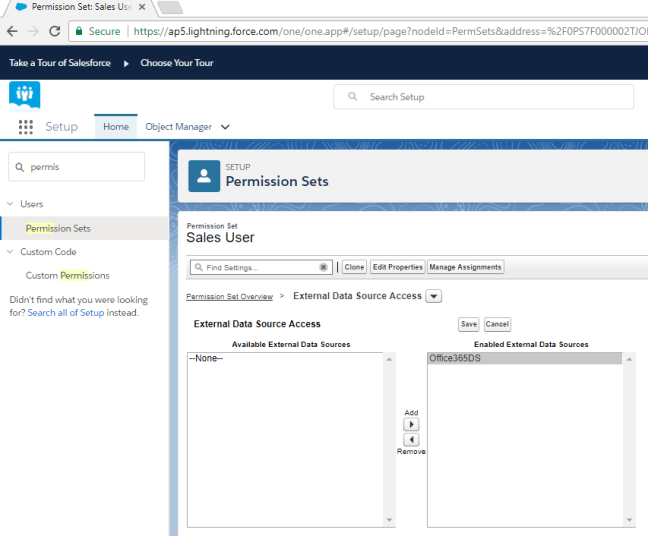
10. From Permission set page,
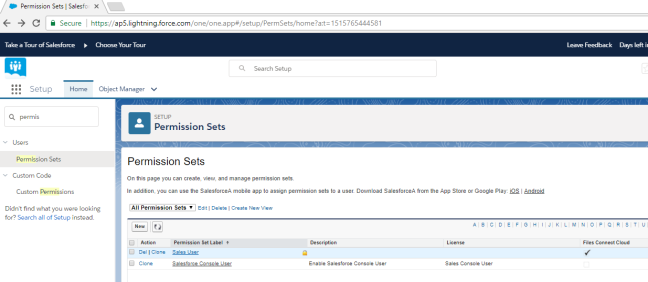
choose external data source access.
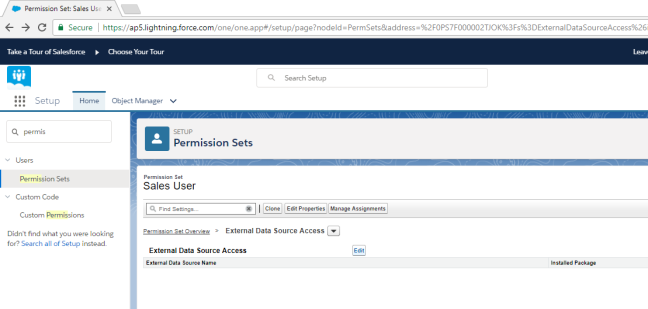
click edit and add data source and save.
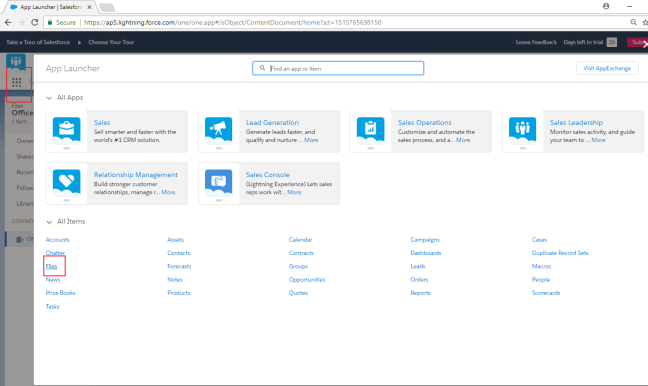
11. go to app launcher, and click on files.
12. under connected source, you will be seeing Office 365 files
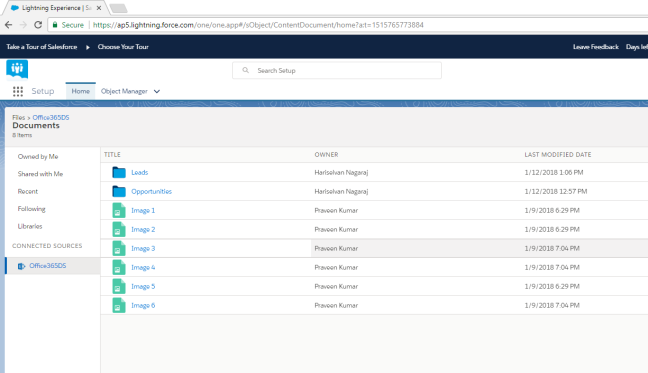
clicking on document title will take the user to office 365 site.
