Using HTTP Call/ Rest API from SharePoint Designer workflow to create list

In this post, i will show how to call http/rest API using SharePoint Designer workflow to create new task List.

Open SharePoint Designer.

Create a workflow and add the below steps.

  1. Set variable RESTUrl of type string with value as workflow context – current site url and append _api/web/lists.http8
  2. Build Dictionary, add two string variables(Accept – Type String – Value as application/json;odata=verbose) and Content-Type as another variable with type string and value as application/json;odata=verbosehttpcall1
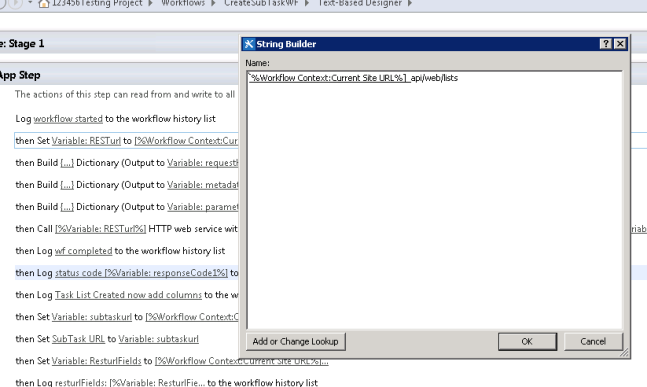
output to variable requestHeaders.
  3. Add one more step, build dictionary, add variable name as type and type as String with value SP.List as below.httpcall2output variable to metadata.
  4. Add another Dictionary with variables below.httpcall3.PNGoutput variable to parameters.
  5. add variable like __metadata of type dictionary and choose workflow variable and choose variable metadata.httpcall3
  6. note: metadata variable should have two underscores, BaseTemplate as type Integer with value 107. In my case 107 is task list check for others if you want to create other list types, Description as type string and value as some description. Title as type string as per your need.
  7. Add step call http web service as below and change the variable like below.
  8. http4
  9. right click on the step and choose properties and change as needed. change request type to POST
  10. http5
  11. http6http7
  12. Log response code to see if any error comes out. Now trigger the workflow.

Make sure that you have enough permissions to run the workflow. if you face access related errors activate the feature workflow can use app permissions and register the workflow like below

https://docs.microsoft.com/en-us/sharepoint/dev/general-development/create-a-workflow-with-elevated-permissions-by-using-the-sharepoint-workflo 

Thats all.

Information Management Policy Settings / Retention Stage not working for SharePoint Online

Check for “Library and Folder Based Retention” feature under top level site features and activate.

You can enable and add retention stage over List/Library under settings to schedule policy and action over a period of time. for eg, after 30 days of creation date, you can start the workflow to trigger, move to recylcebin, permanently delete the document/list etc.

There are two timer jobs behind the scenes which will run on weekly basis.

For SharePoint On Premise, restart the below timer jobs to make it working.

  1. Expiration Policy.
  2. Information management policy.

For SPO/SharePoint Online we don’t have control over this timer jobs to restart rather need to wait till timer job executes and no other way and will run weekly mostly Monday or Tuesday and depends on timezone.

You can check the last execution date of these timer jobs using SharePoint Designer.

Open the root SharePoint Online site and check for dates for the below two properties from top Ribbon Site Options.

dlc_policyupdatelastrun

dlc_expirationlastrun

Site Options

As SharePoint Admin, what to do while SQL Server In Place Upgrade from 2005 to 2008 R2

Just wondering what to do with SharePoint while you are performing SQL Server Upgrade?

The purpose of this post is, As a SharePoint Admin/SharePoint stand, what to do while SQL is undergoing maintenance for upgrade.

Checklist to perform for SQL Server In Place Upgrade with in SharePoint & SQL Server:

  1. Backup the SharePoint Site, Content DB as a safe side.
  2. Log on to SharePoint Farm Servers and Stop all the SharePoint related services/applications from IIS Server.

SharePoint_StopApplicationPool

SharePoint_StopSites
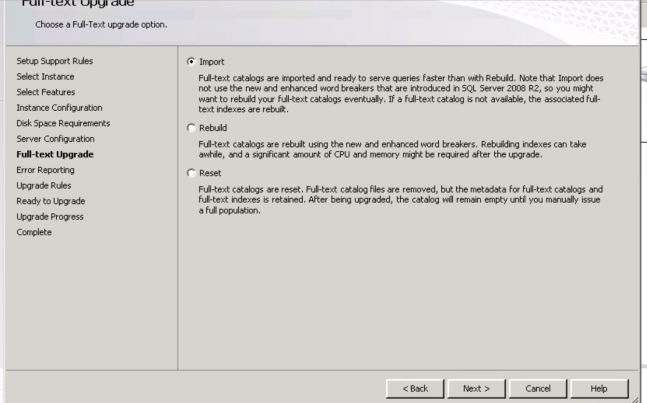
3. Perform  SQL Upgrade from Installation Media.

SharePoint_SQL_InPlaceUpgrade

Sharepoint_SQL_InPlaceUpgrade1

Sharepoint_SQL_InPlaceUpgrade2

SharePoint_SQL_InPlaceUpgrade3

SharePoint_SQL_InPlaceUpgrade4

SharePoint_SQL_InPlaceUpgrade5

Now go to SQL Server 2008 R2 from start menu. You will be asking for customized user settings options.

38

Choose Yes to import settings from previous version.

Sharepoint_SQL_InPlaceUpgrade64. Once Upgrade is complete, start the services and application pools related to SharePoint.

5. Validate the Site to check the upgrade process impact on SharePoint.

6. You may need to rerun the full crawl for SharePoint Search in order to properly work.

7. Verify SQL Server related services in Services.msc, Start Menu, Configuration Manager etc.

8. Verify all the Content DB and DBs are able to access with SQL Server 2008 R2.

I also prefer to refer Microsoft blogs for detailed SQL Server Upgrade Approaches and Supporting versions/editions etc.

Column ContentType does not exist.It may have been deleted by another user while adding/updating the list item

I have taken the list template from SharePoint 2007. Edited the Product version in order to use this template in SharePoint Online similar to this.

After creating the list from template, I tried to add edit list items and facing this error saying that column ContentType does not exist. It may have been deleted by another user while adding/updating the list item.

To overcome this,

I have created single line of text column with name “ContentType”.

After which, I’m able to add and edit the list items.


Microsoft SharePoint Foundation version 3 templates are not supported in this version of the product

This kind of error occurs when you try to create a list using a template which is taken from SharePoint 2007.

version 3 templates error As a workaround, you can still you the template in SharePoint Online but with few/limited settings.

Steps:

  1. Save the list as template from Source Site (2007) with name CustomList.stp
  2. Rename CustomList.stp to CustomList.cab.
  3. Extract the files using winrar to Physical Location e.g., D:\Temp\CustomList.
  4. Edit the manifest.xml with notepad and change the Product Version from <ProductVersion>3</ProductVersion> to <ProductVersion>4</ProductVersion>
  5. Open a command prompt and change to the directory that the manifest.xml and CustomList.cab files are located by using cd (D:\Temp\CustomList)
  6. Run the below command
  7. D:\Temp\CustomList>makecab manifest.xml CustomList.cab
  8. Rename it back to CustomList.stp
  9. Go to Destination Site – List Templates upload the CustomList and create the List from this template.

You may face editing or updating the list items that i will cover in other post.

Migration from SharePoint 2007 to SharePoint Online/Office 365

Recently I had to move existing SharePoint 2007/WSS Site On Premise to SharePoint Online/ Office 365 Site and that led me to this post.

When it comes to Migration, each Migration and approach will vary depending on several factors and based on the content.

Our role is to identify and go for the best migration approach.

I have done quick analysis on Migration options.

Points to be considered before any Migration or check list:

  1. Check the Site Hierarchy and determine the Site Inventory in terms of available Sites/Sub sites/ Lists/ Libraries/ Pages etc in excel sheet.
  2. Check on the volume of the content to be migrated and come to an idea in terms of size.
  3. Check on Lists, Libraries that having Lookup, Content Types, Workflows, Permissions etc.
  4. Check on User and Groups.
  5. Determine whether to maintain or preserve Meta Data Properties.
  6. Check for Managed Meta Data.
  7. Clean up unused Content(Lists and Libraries)
  8. Re structure Lists and Libraries on Destination site if unorganized.

Migration Approach:

  1. Third Party Tools:

I prefer to use any of the famous Third Party Tools such as Share-gate / Meta Logix /Doc Ave etc.

Pros of going for the third party tools are

Hassle – free

Reports can be generated.

can run pre-upgrade check for dependencies.

Individual Lists/Libraries can also be moved.

Maintain same site hierarchy

Preserve Meta Data Properties like Created Date, Modified Date, Created By and Modified By columns.

Cons

Cost effective and Licensed.

2. Power-Shell:

You can go with SharePoint Online Management Shell for Migration of Content from SharePoint On Premise to SharePoint Online.

Involves custom development of PowerShell script.

Efficient way to move Documents from Windows File Share/ Network Drive.

File Meta Data can be preserved or updated using PowerShell Script.

3. SharePoint Migration Tool:

It is a free tool provided by Microsoft for Migration of content from various sources.

Sources can be

SharePoint on-premise

File Share

CSV File

It requires

Office 365 Subscription

Azure subscription

Cons:

Only Date Modified column can be preserved.

4. Manual Migration:

Last but not least you can go for Manual Migration.

Windows Explorer View:

You can use Windows Explorer View for Libraries(On Premise Site) in Internet Explorer to Copy the Documents and Paste them in Window Explorer View of Destination Site(Office 365).

File Meta Data Properties cannot be retained or Preserved.

For Lists, You can save the list as a template with data if data is not exceeding the SharePoint List Limit and move the templates to the Destination site and restore them. You may face templates are not supported in this version of the product error. I have workaround for that probably will cover in other post. However, will have few limitations in terms of list settings may not work.

If the lists are having lookup mapped to other columns those columns may need to recreated and filled up manually.

You can even save the site as template without content and then create the site in destination from the template. That way you can have mapped lists/library and site structure. Later for Lists you can export the the list to excel file and the re import from the list choosing the exported file.

Overall, each migration approach has their set of Pros and Cons and entirely depends upon the content and clients budget.


Server side activities have been updated. You need to restart SharePoint Designer to use updated version of activities

While Opening SharePoint Designer and trying to create new SharePoint Designer workflow or open existing Designer Workflows, you may come across this kind of error saying “Server-side activities have been updated. You need to restart SharePoint Designer to use updated version of activities” message.

server side activities error

As a workaround, do

Clear SharePoint Designer Cache:

  1. Close SharePoint Designer 2013
  2. Delete everything at %USERPROFILE%\AppData\Local\Microsoft\WebsiteCache
  3. Delete everything at %APPDATA%\Microsoft\Web Server Extensions\Cache
  4. Go to SPD2013 options –> General –> Application Options –> Uncheck the “Cache site data across SharePoint Designer sessions”
  5. Restart the SharePoint Designer and open/create the workflow.

Update SharePoint Designer:

Update the SharePoint Designer to the latest package available and check to see if this resolves your problem.

If still problem exists try to Open the SharePoint/Office 365 Site probably in some other system/machine and check to see if the problem still exists.

In my case I’m able to open the site/workflow from another machine.


Change Sub Site Master page without enabling Publishing Feature

At times you may need to change or apply different master page for sub sites that are inheriting permissions/ inheriting site master page from parent site.

If publishing feature is not activated, you will not be available with Master Page setting under Site Settings.

To make the link available you may need to activate the publishing feature and Site Collection Features and Site Features.

Here is tip/trick to change the master page without activating the features.

Just browse to https://<Site URL>/_layouts/15/ChangeSiteMasterPage.aspx and change the system/site master page as per your wish.

No Publishing Feature

changesubsitemasterpage.png

Determine Size of the SharePoint Lists or Libraries

It is very obvious thing to determine the size of lists/libraries especially when you need to migrate/move the lists/libraries/documents across the site collections and choose the correct approach form migrating lists/libraries.

To know the size/content of Libraries/lists data, go to site settings – Storage Metrics under Site Collection Administration section. This page will display the metric info in-terms of name, size, % of size quota used, Last modified etc.

You can even dig inside deeper with the sites,sub sites,Lists, Libraries etc to know inner level metrics as well.

You can even go directly to this URL:

https://<YourSiteURL>/_layouts/15/storman.aspx

storage metrics

Create Short Description column for Announcements List

We cannot use Multiple line of text column as part of calculated column as this is the restriction.

For example,  I need to create Description column with full description and want another column to have just 100 or 200 characters from the original description. Here is the tricky part to have Description as part of Calculated Columns. Follow the steps below to achieve this.

  • Create single line text column “Description”
  • Create calculated column(DescriptionCopy) that copies single line text(Description)
    • Formula: =[Description]
  • Remove the single line text column. (“Description”)
  • Create a multi-line text column with the exact same name of the original single-line text column(“Description”) with plain text.
  • Create a second calculated column(“DescriptionCalc”) and use the content of the first calculated column(“DescriptionCopy”) with below formula.
    • Formula: =LEFT(DescriptionCopy,100)
  • Change the exiting view to display required columns.

That’s it now you will have Short Description field with 100 characters from Description field.

Short Description Announcements